

Mastering Rust Fundamentals: Statements, Expressions, Control Flow, and Repetition
In this lesson, we will explore concepts like Statements, Expressions, Control Flow, and Repetition.


GitHub repo with all the code
https://github.com/codeTIT4N/rust-school
For this lesson: https://github.com/codeTIT4N/rust-school/tree/main/lesson-5
Make sure to star/fork/watch it on GitHub.
Statements and Expressions
We learned about functions in the last blog of this series. Function bodies are made up of a series of statements optionally ending in an expression.
But, why do we need to learn about statements and expressions?
Because Rust is an expression-based language. This means Rust is a programming language in which every (or nearly every) construction is an expression and thus yields a value.
How are statements and expressions different from each other?
Statements are instructions that perform some action and do not return a value.
Expressions evaluate to a resultant value.
Examples:
We’ve already used statements and expressions. Creating a variable and assigning a value to it with the let keyword is a statement. Example:
fn main() {
    let x = 6;
}
In the above example, the let statement is not the only statement, the main function is also a statement(since it doesn't return a value).
NOTE: Function definitions are also statements; the entire preceding example is a statement in itself.
Statements do not return values. Therefore, you can’t assign a let statement to another variable, as the following code tries to do; you’ll get an error:
let x = (let y = 6);
This is because the let y = 6 statement does not return a value, so there isn’t anything for x to bind to.
Important side note:
This is different from what happens in other languages, such as C and Ruby, where the assignment returns the value of the assignment. In those languages, you can write x = y = 6 and have both x and y have the value 6; that is not the case in Rust.
Expressions evaluate to a value and make up most of the rest of the code that you’ll write in Rust. Consider a math operation, such as 5 + 6, which is an expression that evaluates to the value 11.
Expressions can be part of statements
The 6 in the statement let x = 6; is an expression that evaluates to the value 6. Calling a function is an expression. Calling a macro is an expression. A new scope block created with curly brackets is an expression.
Important Example:
fn main() {
    let k = {
        let w = 3;
        w + 1
    };

    println!("The value of k is: {k}");
}
In this example, the expression:
{
    let w = 3;
    w + 1
}
is a block that, evaluates to 4. That value gets bound to k as part of the let statement. Note that the w + 1 line doesn’t have a semicolon at the end. Remember, we were not allowed to put a semicolon at the end of a function in the last lesson.
The thing is:
Expressions do not include ending semicolons. If you add a semicolon to the end of an expression, you turn it into a statement, and it will then not return a value. Keep this in mind.
NOTE: In the last blog when we tried to return a value from the function using an explicit return statement and put a semicolon after that, it worked. This was because due to the return present there, the function returned/terminated at that point.
Now, let's explore the above example to further understand this concept. So, consider this part of the example:
let k = {
    let w = 3;
    w + 1
};
You can see there is a semicolon at the end after } . This is because of the let statement. Being a statement it should not return any value so, if I remove this semicolon it will throw an error. A semicolon tells Rust this is where this statement ends.
NOTE: Go to the GitHub repo, clone it, and try out different things like adding, and removing semicolons and experiment to make sure you really understand this part as it is very important.
Control Flow
In Rust, the code is executed line-by-line. But this can be changed using certain expressions (Note, the word expression is used here).
The most common constructs that let you control the flow of execution of Rust code are if expressions and loops.
if Expressions
An if expression allows you to branch your code depending on conditions. You provide a condition and then state, “If this condition is met, run this block of code. If the condition is not met, do not run this block of code.”
Example:
fn main() {
let number = 3;
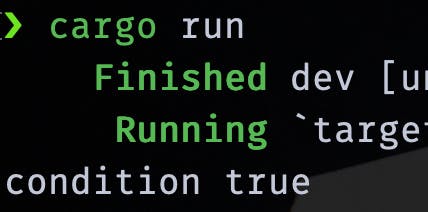
if number < 5 {
println!("condition true");
} else {
println!("condition false");
}
}
Here, after the if we have a condition which, if true it will go inside the first block ({}) and if it is false it will go inside the other block. So, here since 3 is less than 5 it will print condition true
Side Note: The if statements are called branches and the blocks of code associated with the conditions in if expressions are sometimes called arms.
One more this to note is that the else part is optional.
It’s also worth noting that the condition in this code must be a bool. If the condition isn’t a bool, we’ll get an error. For, example the following code will throw an error:
let number = 3;

if number {
    println!("number was three");
}
It will give:
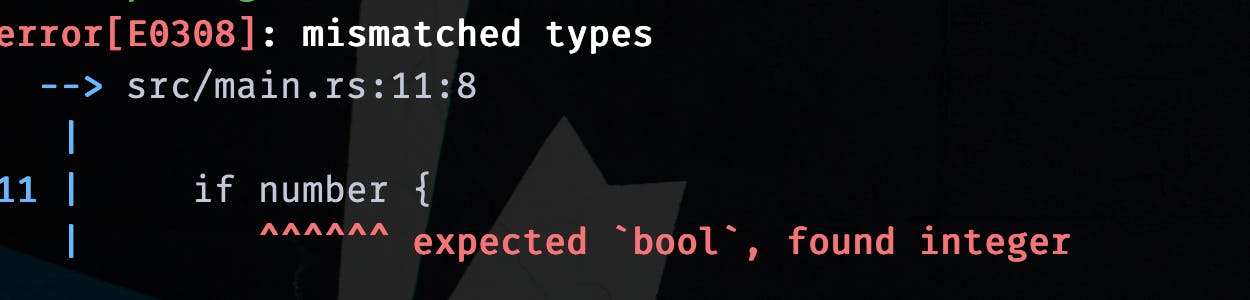
Here, you can see the amazing Rust compiler explains the problem very well.
Handling multiple conditions with else if
Similar to other programming languages you can also use the else if expression like this:
let another_number = 6;

if another_number % 4 == 0 {
    println!("number is divisible by 4");
} else if another_number % 3 == 0 {
    println!("number is divisible by 3");
} else if another_number % 2 == 0 {
    println!("number is divisible by 2");
} else {
    println!("number is not divisible by 4, 3, or 2");
}
Here, according to the value of another_number the program has 4 paths:
Is
another_numberdivisible by 4Is
another_numberdivisible by 3Is
another_numberdivisible by 2if it satisfies any of the above cases it will give output accordingly otherwise it will execute the
else
In our example the output will be:
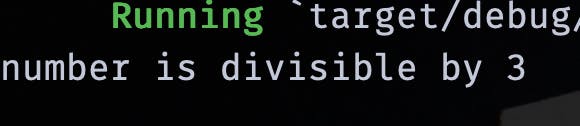
Note that even though 6 is divisible by 2, we don’t see the output number is divisible by 2, nor do we see the number is not divisible by 4, 3, or 2 text from the else block. That’s because Rust only executes the block for the first true condition, and once it finds one, it doesn’t even check the rest.
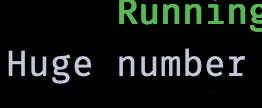
Nested if else
let a = 201;

if a > 99 {
    if a > 200 {
        println!("Huge number");
    } else {
        println!("Big number");
    }
} else {
    println!("Small number");
}
Here, if a is greater than 99 then it will go inside the first branch and if it is not it will go to the outer else . Now, if it goes inside the first branch then it will check again if a is greater than 200 it will execute the inner if otherwise, it will execute the inner else. Output:
Side Note: One suggestion try to always include "else" unless there truly is no alternative case.
Using if in a let statement
Because if is an expression, we can use it on the right side of a let statement to assign the outcome to a variable. It will look like this:
let condition = true;
let the_number = if condition { 5 } else { 6 };

println!("The value of the_number is: {the_number}");
Here, The the_number variable will be bound to a value based on the outcome of the if expression. Output:

Remember that blocks of code evaluate to the last expression in them, and numbers by themselves are also expressions.
Now, if I try to do this:
let condition = true;
let new_number = if condition { 5 } else { "six" };
It will throw an error. The expression in the if block evaluates to an integer and the expression in the else block evaluates to a string. This won’t work because variables must have a single type, and Rust needs to know at compile time what type the new_number variable is, definitively.
Side Note: Knowing the type of new_number lets the compiler verify the type is valid everywhere we use new_number. Rust wouldn’t be able to do that if the type of new_number was only determined at runtime; the compiler would be more complex and would make fewer guarantees about the code if it had to keep track of multiple hypothetical types for any variable.
Repetition
This is another way of controlling the flow of code execution in Rust. It’s often useful to execute a block of code more than once. This is done by using various types of loops, which will run through the code inside the loop body to the end and then start immediately back at the beginning. This is also sometimes called looping.
Repeating code with loop
The loop keyword tells Rust to execute a block of code over and over again forever or until you explicitly stop it.
But, wait why would you want to run some code forever?
Let me give you an example of this situation. Let's say you have an embedded device that is monitoring the temperature of a device and we want it to alert us if the temperature goes above some value, then this forever loop can come in handy.
Example:
fn main() {
    loop {
        println!("again!");
    }
}
If I try to run this, I will get a non-terminating program that is printing "again!" constantly in my terminal. To terminate this you can press ctrl-c on your keyboard.
Note: Do forget to terminate this program.
Breaking from a loop
Rust also provides ways to break from a loop using the break keyword:
let mut counter = 0;
loop {
    counter += 1;

    if counter == 10 {
        break;
    }
}
println!("The value of counter is {counter}");
In this example, we have a mutable variable counter which keeps on increasing by 1 until it reaches 10 and then breaks/exits from the loop because of the break keyword. Output:

coninue keyword
Rust provides a special keyword continue which when encountered, that particular iteration is terminated, and the control is returned to the loop head, typically continuing with the next iteration. For example:
let mut number = 0;
loop {
    number = number + 1;
    if number == 10{
        break;
    }
    if number % 2 == 0 {
        continue;
    }
    println!("{number}");
}
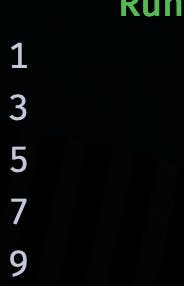
Let's understand the continue keyword with the above example:
Here, we have a mutable variable number with an initial value of 0. When we come inside the loop first the number is incremented by 1 , then we check if the number is equal to 10, if it is, we break out of the loop using the break statement. If it is not we move on to the next condition which is: is the number divisible by 2(even number), if yes then we execute the continue , which would mean that this particular iteration will be stopped and anything below this will not execute.
So, here if I get an even number I will continue with the loop but skip this iteration. i.e., the println!("{number}"); (below this if) will not execute. And if the number is not even it will simply print that number. So, this should print all the odd numbers between 1 and 10. Output:
Returning values from Loops
One of the uses of a loop is to retry an operation you know might fail, such as checking whether a thread has completed its job. You might also need to pass the result of that operation out of the loop to the rest of your code.
To do this you can add the value you want to be returned after the break expression you use to stop the loop; that value will be returned out of the loop so you can use it.
Example:
let mut new_counter = 0;
let result = loop {
new_counter += 1;
if new_counter == 10 {
break new_counter * 2;
}
};
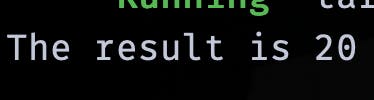
println!("The result is {result}");
Note this part: break new_counter * 2; . Here, we are returning the new_counter * 2 from the loop by putting it after the break . Output:
Loop labels
If you have loops within loops, break and continue apply to the innermost loop at that point. You can optionally specify a loop label on a loop that you can then use with break or continue to specify that those keywords apply to the labeled loop instead of the innermost loop.
Loop labels must begin with a single quote. It looks like this:
'labeled: loop{
}
Here is an example of this in practice:
let mut count = 0;
'counting_up: loop {
    println!("count = {count}");
    let mut remaining = 10;

    loop {
        println!("remaining = {remaining}");
        if remaining == 9 {
            break;
        }
        if count == 2 {
            break 'counting_up;
        }
        remaining -= 1;
    }

    count += 1;
}
println!("End count = {count}");
The outer loop has the label 'counting_up, and it will count up from 0 to 2. The inner loop without a label counts down from 10 to 9. The first break that doesn’t specify a label will exit the inner loop only. The break 'counting_up; statement will exit the outer loop. Output:

Conditional Loops with while
The infinite loops with an optional termination condition are not always practical. Enter while loops. A while loop looks like:
while condition {

}
This loop will run until the condition is true. This construct eliminates a lot of nesting that would be necessary if you used loop, if, else, and break, and it’s clearer. While a condition evaluates to true, the code runs; otherwise, it exits the loop.
Example:
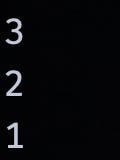
let mut val = 3;

while val != 0 {
    println!("{val}");

    val -= 1;
}
In this example until the value of val is not equal to 0, the loop will run. And the val will keep decreasing by 1 on every iteration. Output:
Looping through a collection with for
Iterating through a collection(like an array) can be done easily using the for loop. We can also use while loop for this, but for loop is a more concise alternative. Example:
let a = [10, 20, 30, 40, 50];

for element in a {
    println!("the value is: {element}");
}
In this example, we are iterating through the array a using the for loop. Output:
This can also be done using a while loop:
let a = [10, 20, 30, 40, 50];
let mut index = 0;

while index < 5 {
    println!("the value is: {}", a[index]);

    index += 1;
}
It will also give the same output. But you can see how much easier for loop makes this.